Who doesn't like the security. This is one of critical element of our IT Infrastructure. Recently I was doing one POC and got requirement to setup a valid SSL certificate in Weblogic. However, since it was just an POC we were not having any valid SSL certificate issued by some Certificate Authority. Later, I came across for one website called https://letsencrypt.org/ . Let’s Encrypt is a free, automated, and open certificate authority (CA). they give people the digital certificates they need in order to enable HTTPS (SSL/TLS) for websites, and its free, yes you heard correctly It's FREE !!!. You don't need to pay them at all. So if you need a valid SSL certificate for your POC or even for Production environment you can get one from them. Although their certificate comes with 3 month validity, so while using for Production environment user need to keep renewing with them with simple automated process.
In this blog we will be learning how we can generate letsencrypt SSL certificate, what's prerequisite to get the certificate and setup that certificate in Weblogic server to enable SSL communication.
So, Lets move on. We will be doing below stuff in sequence -- Get a registered domain name (This required while generating SSL Cert)
- Install Certbot ACME Tool and Apache HTTP Server
- Generate Letsencrypt SSL Certificate
- Configure Letsencrypt SSL in Weblogic Identity Store
Get the Registered Domain Name (Optional if you have already one):
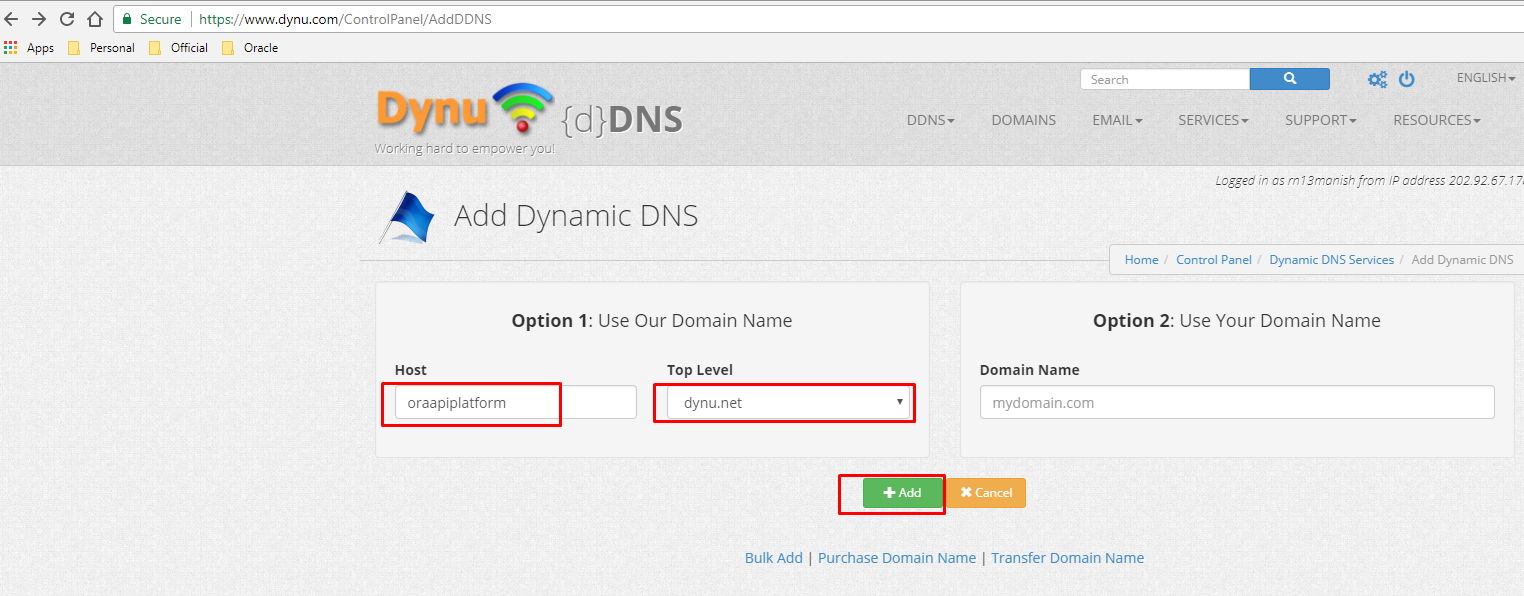
Before we get the SSL Cert, one of the prerequisite is to have a valid domain name which must be routing to some live server, while generating SSL Cert it ask what domain name you want to setup for this SSL. So, since I was just doing POC I got one from this website https://www.dynu.com/. This site provide a free sub domain name. In my case the domain name which I have created was apiplatform.dynu.net.
Off course, in real situation you must be having a valid domain name and routing must have been configured via popular DNS Server to F5 to Actual Server which running your Application.
So, jump to https://www.dynu.com website and sign-up free. Once logged in, go to "DDNS Service" and add a domain name there as per given sample snap -
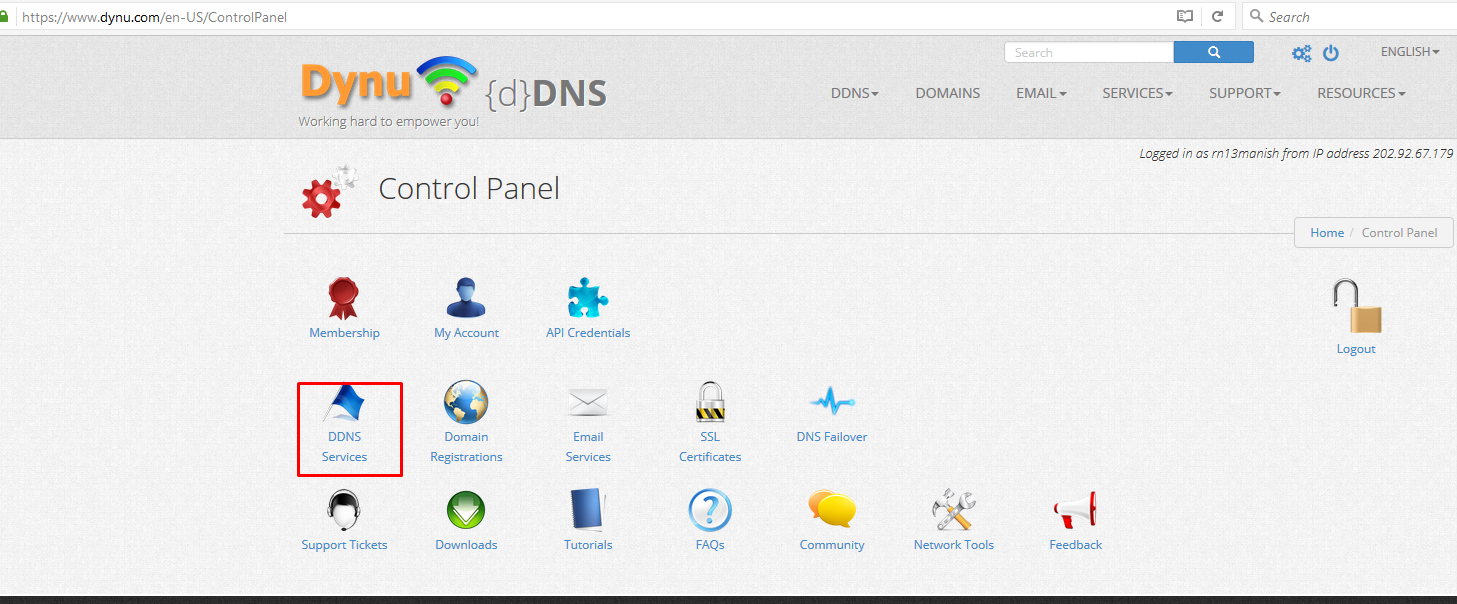
Specify Domain Name and select sub domain value from given list as per your choice.
Now, do mapping to your F5 or actual server IP where traffic is about to route-
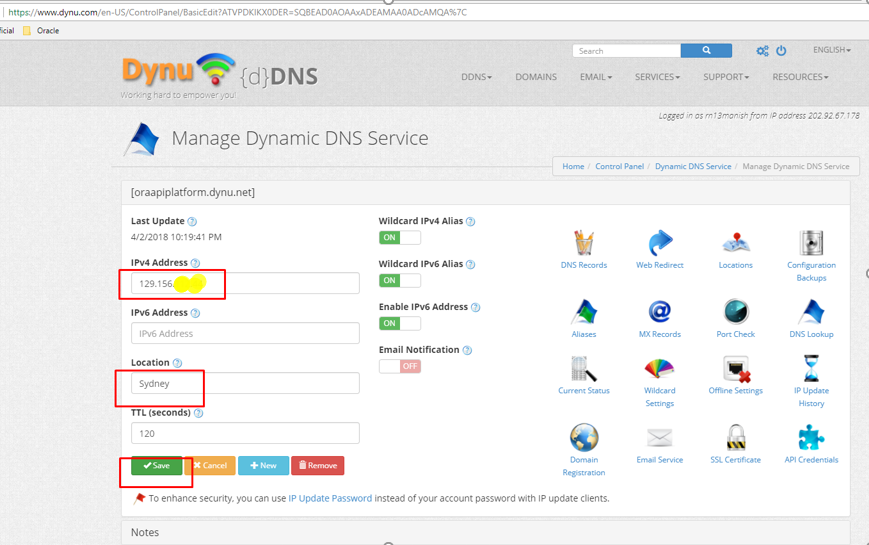
Now, our domain name been created and its mapped to server where traffic is about to route. Let's jump to the next step where we need to generate and download SSL certificate.
In order to get a certificate for my domain from Let’s Encrypt, I have to demonstrate control over the domain. With Let’s Encrypt, you do this using software that uses the ACME protocol, which typically runs on your web host.
Letsencrypt recommend that most people with shell access use the Certbot ACME client. It can automate certificate issuance and installation with no downtime. It also has expert modes for people who don’t want auto configuration. It’s easy to use, works on many operating systems, and has great documentation. Visit the Certbot site to get detailed documentation about this tool specific to your operating system.
In my case I was using Red Hat Enterprise Linux Server release 7.2 (Maipo), so I have to follow the instruction related to this OS given at Certbot website. In your case if your operating system different then check Certbot website for OS specific instruction.
Certbot Installation:
Before you do certbot installation, Certbot needs "ol7_optional_latest" repository in the Oracle Linux repository file (/etc/yum.repos.d/public-yum-ol7.repo) by making sure the "enabled" flag is set to "1".

Also, enable the EPEL repository for your Oracle Linux version.
# cd /tmp
# wget https://dl.fedoraproject.org/pub/epel/epel-release-latest-7.noarch.rpm
# rmp -Uvh /tmp/epel-release-latest-7.noarch.rpm
Finally Install certbot
# yum install python-certbot-apache -y
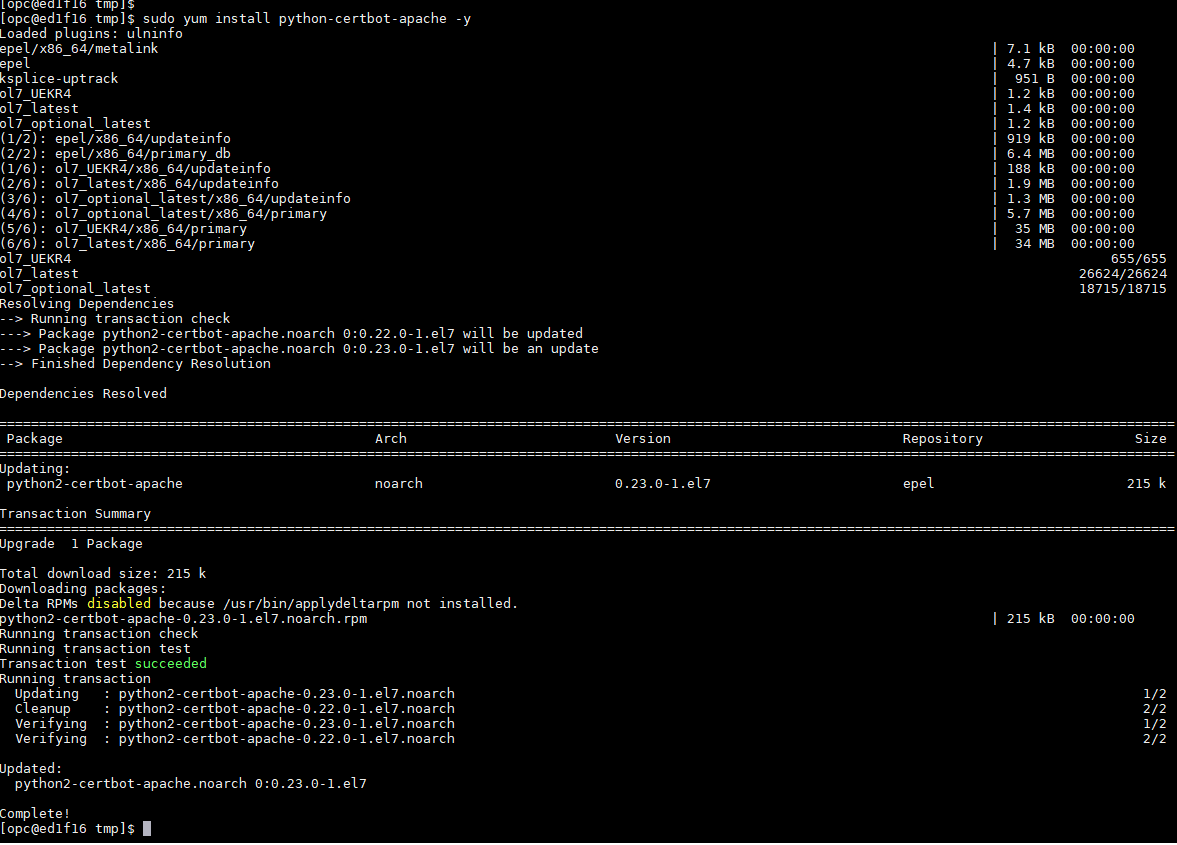
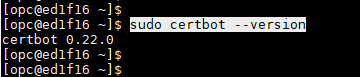
Once certbot installed check the version of certbot using below command -
#sudo certbot --version
It should show something like this.
Next, we need to generate SSL certificate. Certbot client support two types of plugins which help to obtain the certificate from letsencrypt website. Some plugins can only download the certificate but others can install the certificate for you. The details of plugins and their respective behavior are given in this link.
In in my case, I have used "webroot" plugins to download the SSL certificate from letsencrypt website.
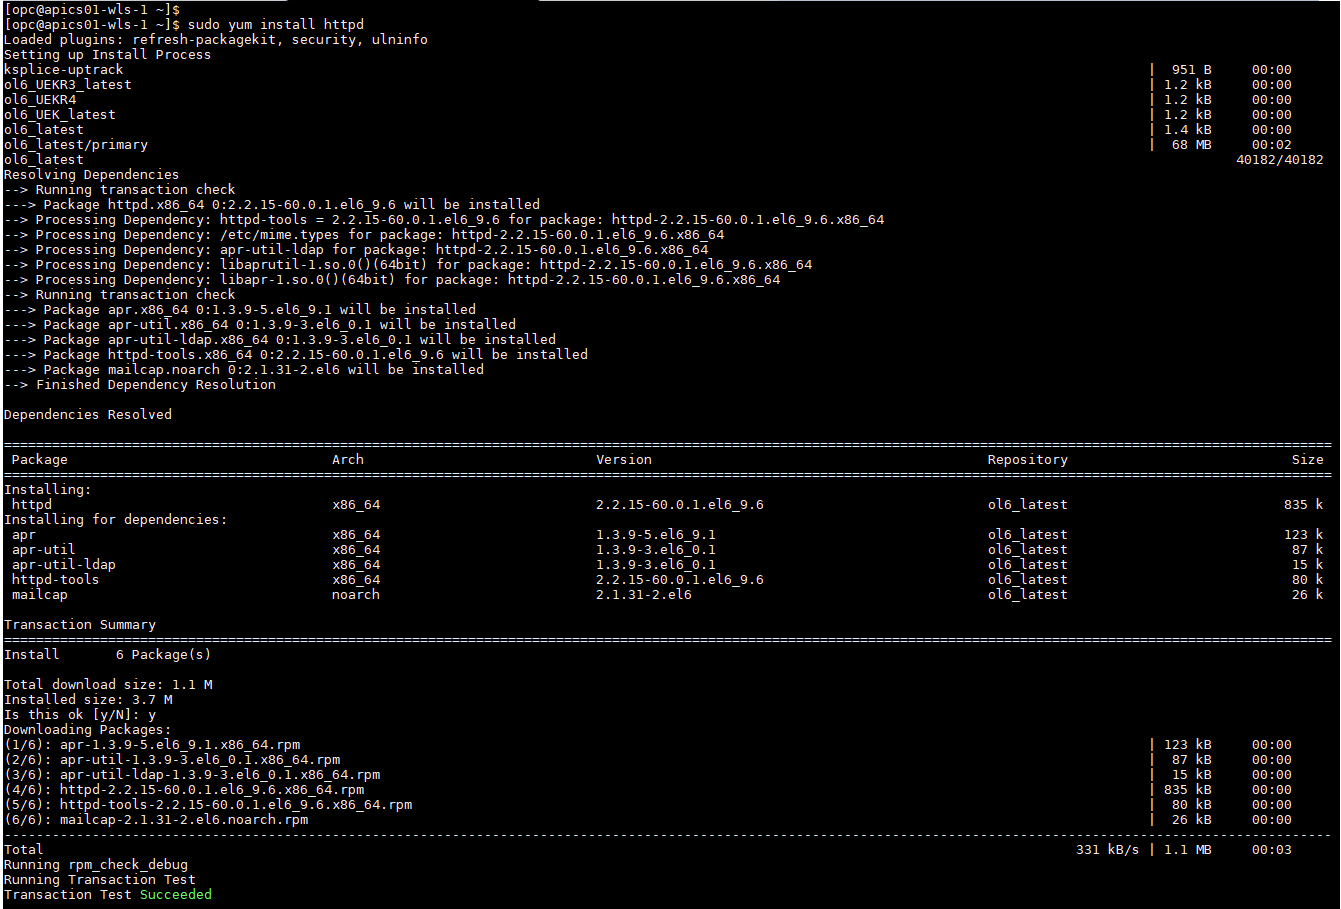
The prerequisite for this plugins is to have http server running on server where you trying to download the SSL Certificate. Hence, I ended up installing and running Apache httpd server. Installing the httpd server and starting is very easy. You can find 100 of blog explaining how you can do that.
Just run below commands and http server will be running easily.
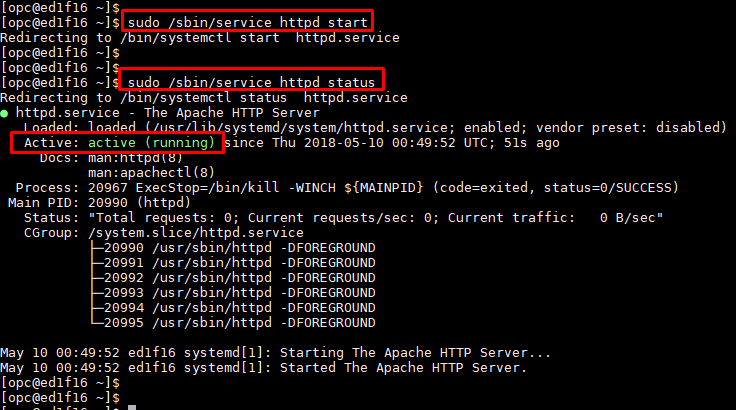
Once installed, we need to start the http server by using this command
$ sudo /sbin/service httpd start
Also check http server status
#sudo /sbin/service httpd status
So, now we have installed certbot ACME tool, also installed the web server and both are running. Now, next step to make sure port 80 is allowed at your firewall because while certbot generate the SSL Cert under the hood webroot plugins use one of several ACME protocol challenges to prove you have full control a domain.
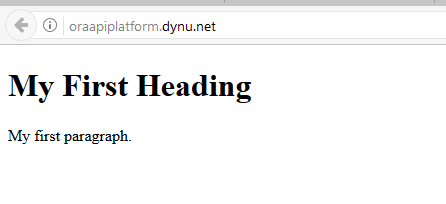
Once firewall setup for your environment, you can place any sample html file under your Webserver root directory and try to test that html page, it should get open via DNS name which you have setup earlier.
The apache webserver root directory normally located this default location /var/www/html, so if you drop an html file in this location, it can picked by http server straight way without any deployment etc. and that's what I did to make sure my http server is running and responding over internet on port 80
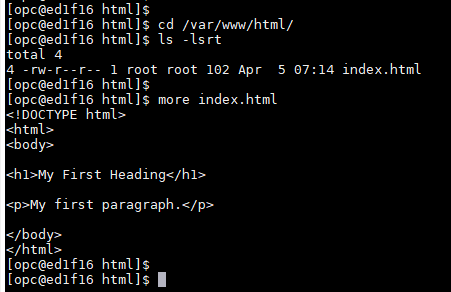
Once above configuration done, test index.html in browser.
So, everything is ready to go now. let's move to run the command which will generate the SSL Certificate in your local system using Certbot ACME tool and webroot plugins.
Run the below command to generate the SSL certificate.
In above command you need to change http server root directory location if you have any other configuration than default value, also change your email address and most importantly your Domain Name. It will prompt to you enter Agree/Cancel and Yes/No. So select Agree and Yes and it will generate SSL Cert for you.
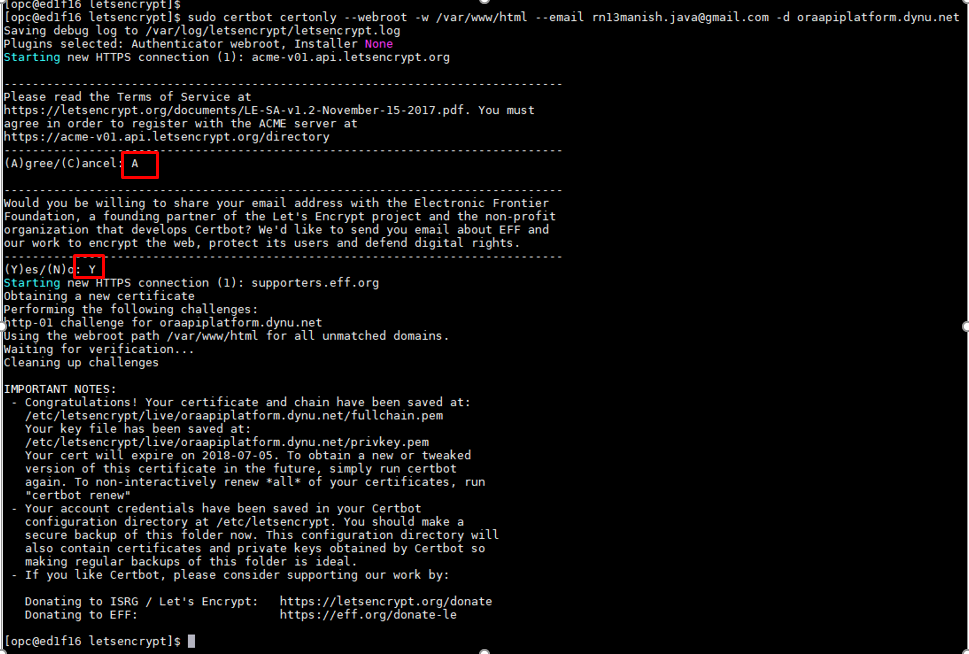
Once above command run successfully, it generate the SSL Cert for given domain and copied it over to default location "/etc/letsencrypt/" and contains below folders-
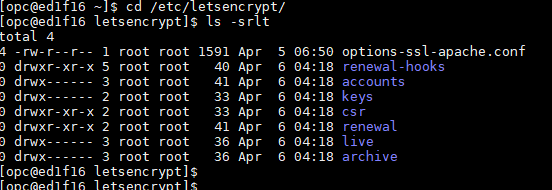
Below are the files contained in each folder-
All generated keys and issued certificates can be found in /etc/letsencrypt/live/$domain. Rather than copying, please point your (web) server configuration directly to those files (or create symlinks). During the renewal, /etc/letsencrypt/live is updated with the latest necessary files.
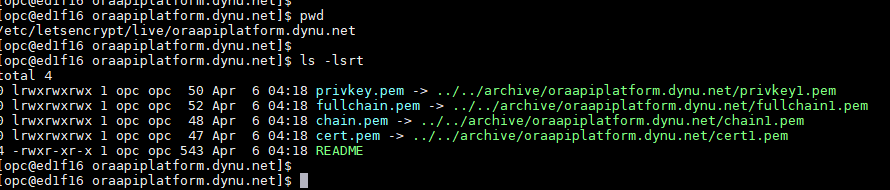
/etc/letsencrypt/archive and /etc/letsencrypt/keys contain all previous keys and certificates, while /etc/letsencrypt/live symlinks to the latest versions.
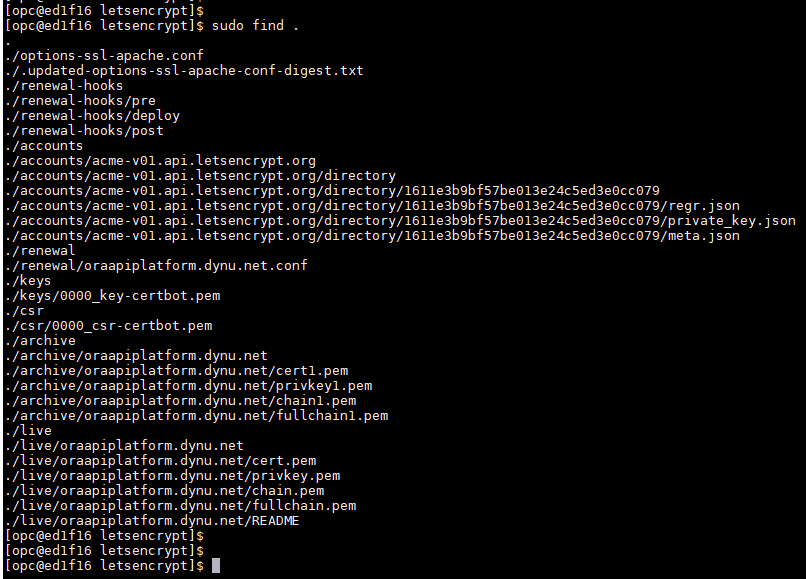
Under the /etc/letsencrypt/live/$domain/live folder following files are available-
privkey.pem - Private key for the certificate.
fullchain.pem - All certificates, including server certificate (aka leaf certificate or end-entity certificate). The server certificate is the first one in this file, followed by any intermediates.
cert.pem - contains the server certificate by itself, and chain.pem contains the additional intermediate certificate or certificates that web browsers will need in order to validate the server certificate. If you provide one of these files to your web server, you must provide both of them, or some browsers will show “This Connection is Untrusted” errors for your site, some of the time.
Note: All Letsencrypt SSL Certificate files are PEM-encoded. If you need other format, such as DER or PFX, then you could convert using openssl utility.
Up until now, we have installed certbot ACME client, http apache web server and download the SSL Certificate. Now, in next step we need to configure this SSL certificate for Weblogic server.
Before we do that as stated above the default format of letsencrypt SSL cert was PEM and Weblogic is using Java Key Store which does not support PEM encoded certificate. Hence, we need to convert this PEM encoded cert to JAVA Key Store specific format. We can do this using "openssl" utility using below command
e.g.
Below command will generate a PFX encoded certificate using letsencrypt PEM encoded certificate
-in = this parameter needs path of letsencrypt fullchain certificate
-inkey = this parameter needs letsencrypt cert private key
-out = indicates format of output cert
-name = indicates the new PEX cert file which will be generated as outcome of above command.
Now, we have converted letsencrypt PEM encoded cert to PEX encoding using openssl command. In next step will convert PEX encoded cert to JKS format using java keytool utility.
Run below command to do that -

-importkeystore = indicate we are importing certificate into given JKS store
-deststorepass = indicates new or existing jks store password
-destkeypass = indicates password for new or existing jks store
-destkeystore = indicate the name and location of jks keystore
-srckeystore = source keystore file name
-srcstoretype = source keystore type
- srcstorepass = source keystore password
alias = this is the name of alias inside JKS keystore for newly imported key
Now we have letsencrypt certificate in JKS format which is supported by Weblogic JAVA keystore. In next steps we are going to use this JKS cert as identity key for Weblogic.
So, in WLS domain you may have one or more managed server, so below steps need to be repeated for each and every WLS server in your domain including Admin Server. If you want only Admin Server to allow SSL then make changed only in Admin Server. Your managed server will be untouched.
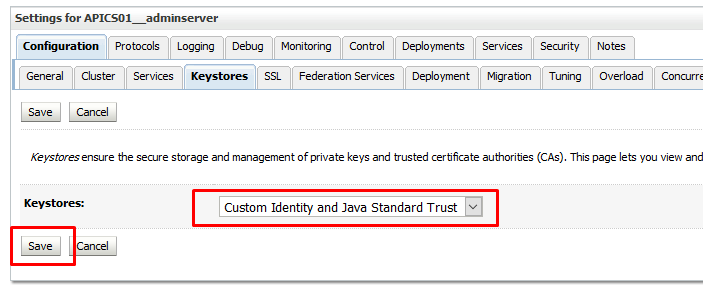
Login into WLS console and navigate to Environment>> Admin Server >> Keystore
and change "Demo Identity and Demo Trust" to "Custom Identity and JAVA Standard Trust"

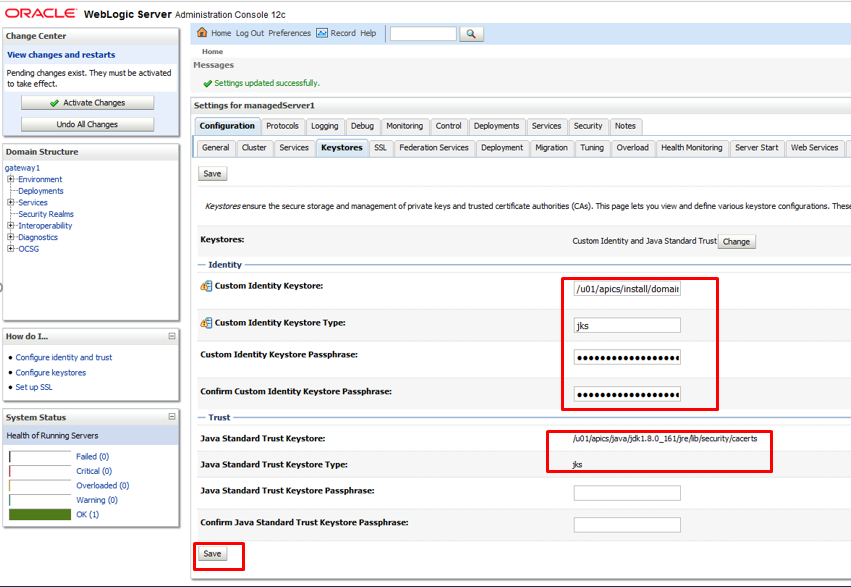
Give new values to all parameters such as -
Custom Identity KeyStore =/u01/xxx/xxx/domain/security/letsEncryptCerts.jks
PassPhrase = changeit
KeyStore Type : JKS
Java Standard KeyStore: /u01/apics/java/jdk1.8.0_161/jre/lib/security/cacerts
KeyStore Type : JKS
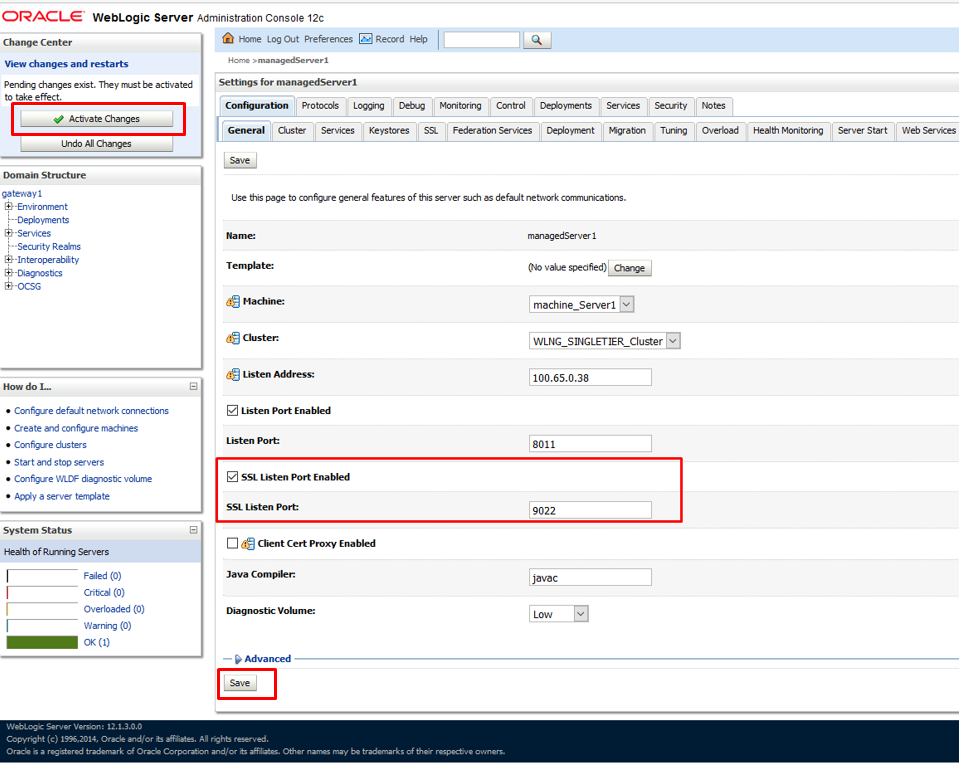
Once you saved the changes. Now, navigate to "ssl" tab page and specify SSL cert alias there along with passphrase
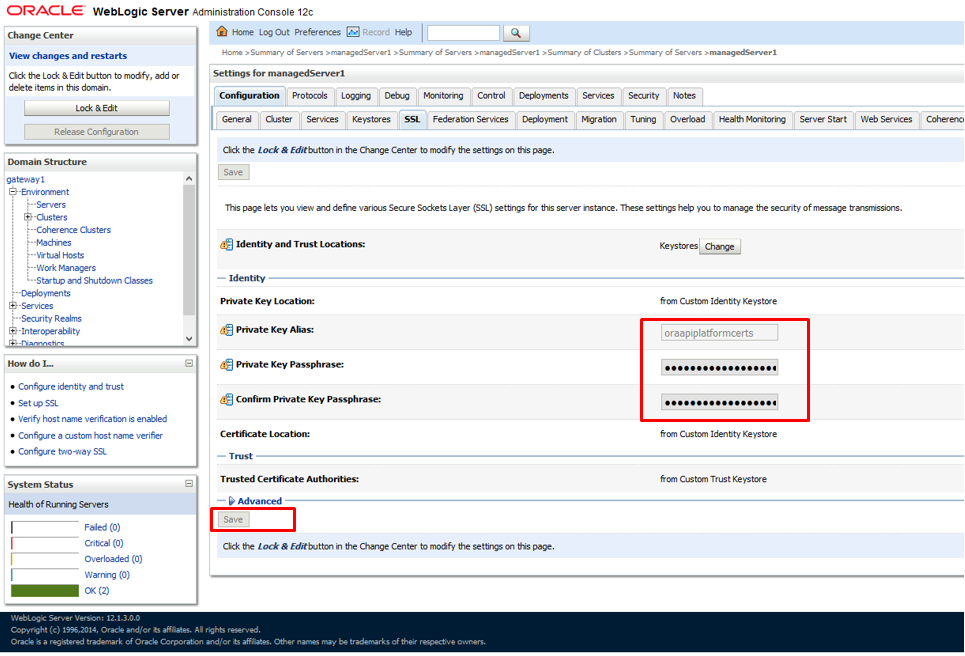
Next, navigate to "General" tab page and make sure SSL Port is enable, save the changes, activate the changes
Repeat the same steps for other WLS servers if you want all managed server to support SSL using this cert and restart entire domain.
Note: Make sure the SSL Port used in your Admin Server and Managed Server must be open in Firewall if your directly accessing them.
Once restarted all the WLS Servers, try to access WLS Admin Server Console using https protocol and port number and you will see now this link been secured using letsencrypt SSl Certificate

Conclusion - I have tried in this blog to demonstrate how you can download a Free valid SSL Cert from Letsencrypt Certificate Authority, also how you can get free Sub Domain name for your website, and how can you configure downloaded certificate for your Weblogic Server to make WLS server more secured.
I hope you like this blog and it may help you to setup the SSL cert for your environment.
Happy blogging :)
References:
https://oracle-base.com/articles/linux/letsencrypt-free-certificates-on-oracle-linux#configure-apache
https://www.tecmint.com/install-lets-encrypt-ssl-certificate-to-secure-apache-on-rhel-centos/
https://redthunder.blog/2017/06/14/teaching-how-to-use-nginx-to-frontend-your-backend-services-with-trusted-ca-certificates-on-https/
https://www.cyberciti.biz/faq/linux-install-and-start-apache-httpd/
https://www.tecmint.com/install-lets-encrypt-ssl-certificate-to-secure-apache-on-rhel-centos/
No comments:
Post a Comment