Customisation is essential part of any SaaS implementation to capture unique business needs. In Salesforce SaaS application also, there could be several use-cases where user might need to create a new Custom Object or add custom fields into existing Standard Object such as Contact, Account and Organisation etc. In this blog I will be showing how can we add Custom fields e.g. Degree name, Passing Year etc. into existing Salesforce Contact object and can update the same field using Oracle Integration Cloud (OIC) Salesforce adapter. I will write another separate blog later where I can show how a completely new Custom Object can be created in Salesforce and updated through Oracle Integration Salesforce Adapter.
Before, I go into deep drive, just want to highlight the core objective of this blog to show Salesforce configuration and OIC Salesforce adapter configuration, I am assuming reader has already basis understanding of OIC product features such as Connection, Integration, mapping and deployment.
My colleague had already covered Salesforce Inbound and Outbound integration using Oracle Integration Cloud Salesforce Adapter. So, I might not be repeating few steps which already been covered in this blog. if you doing Salesforce Integration first time, then its recommended to review these blogs as well.
So let's do deep dive now. Below are the high levels flow and steps which needs to be performed to achieve desired result.

- Create custom fields e.g. Degree Name and Passing year into Salesforce existing Contact Object
- Create/Update Salesforce Connection in OIC
- Create REST Adapter in OIC
- Create Integration which maps Contact Object Custom Fields from Postman to Salesforce
- Activate Integration
- Trigger Integration using Postman
- Verify Result In Salesforce
Create custom fields e.g. Degree Name and Passing year into Salesforce existing Contact Object
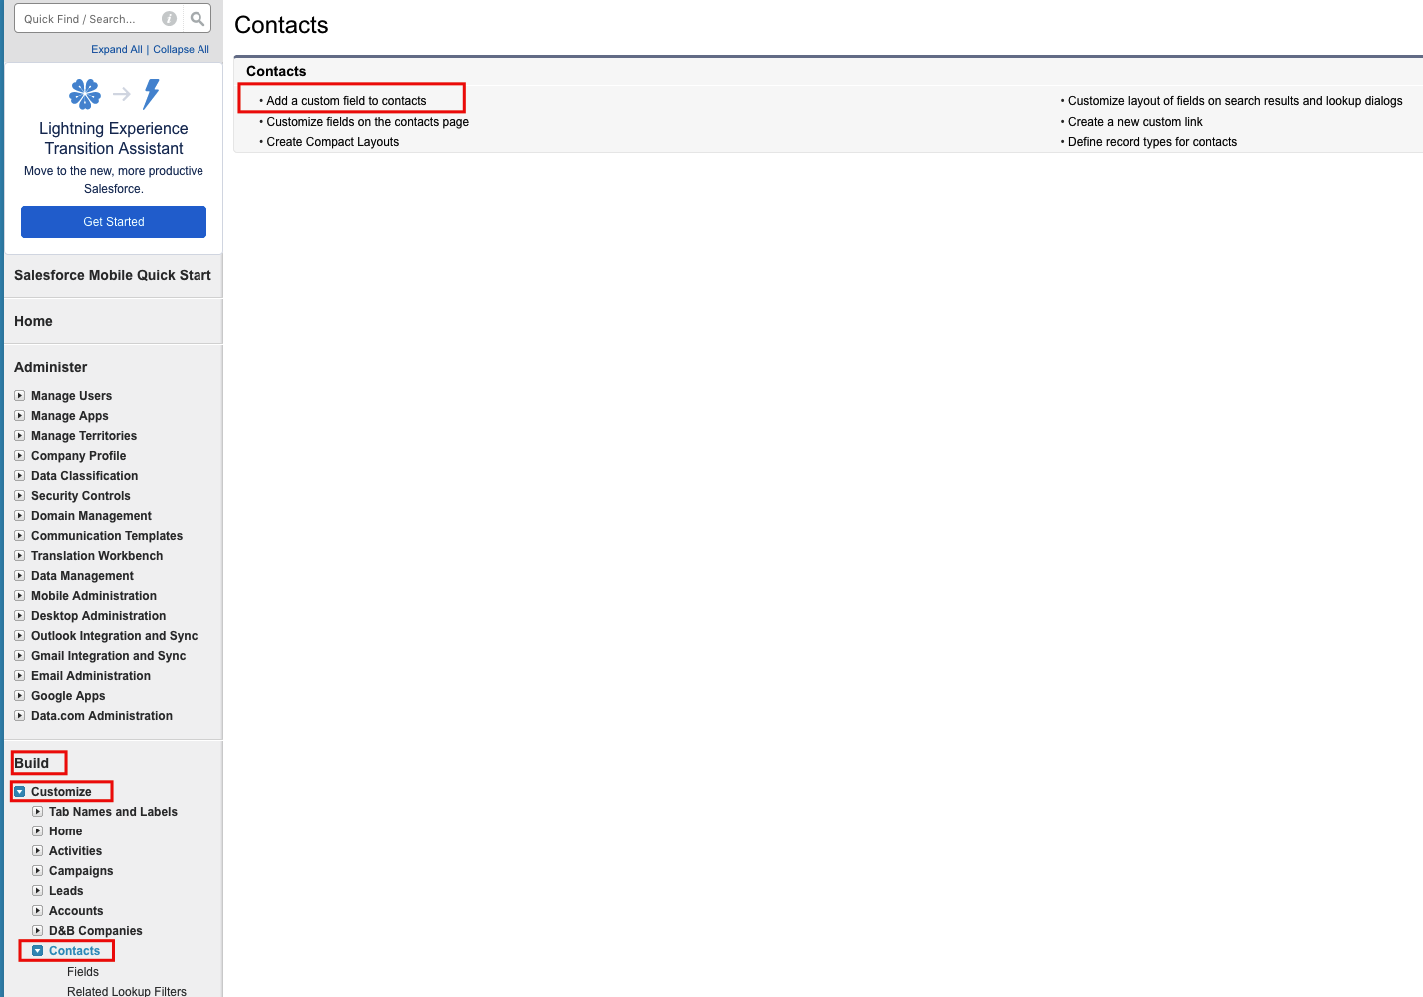
Login into SF using your credentials and navigate to this path Setup >> Build >> Customize >> Contact >> Create Custom Fields to Contact >> New

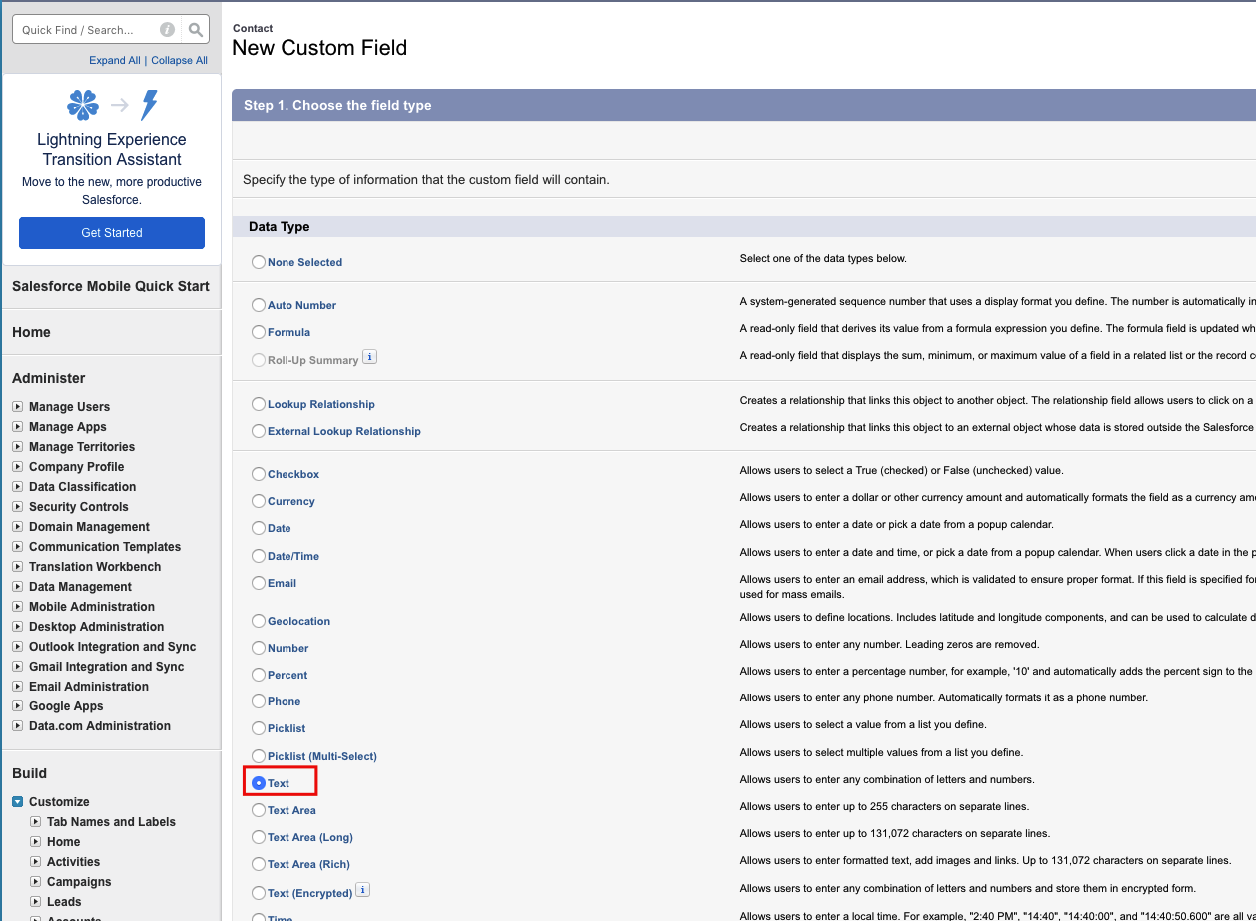
Select the data type of new filed
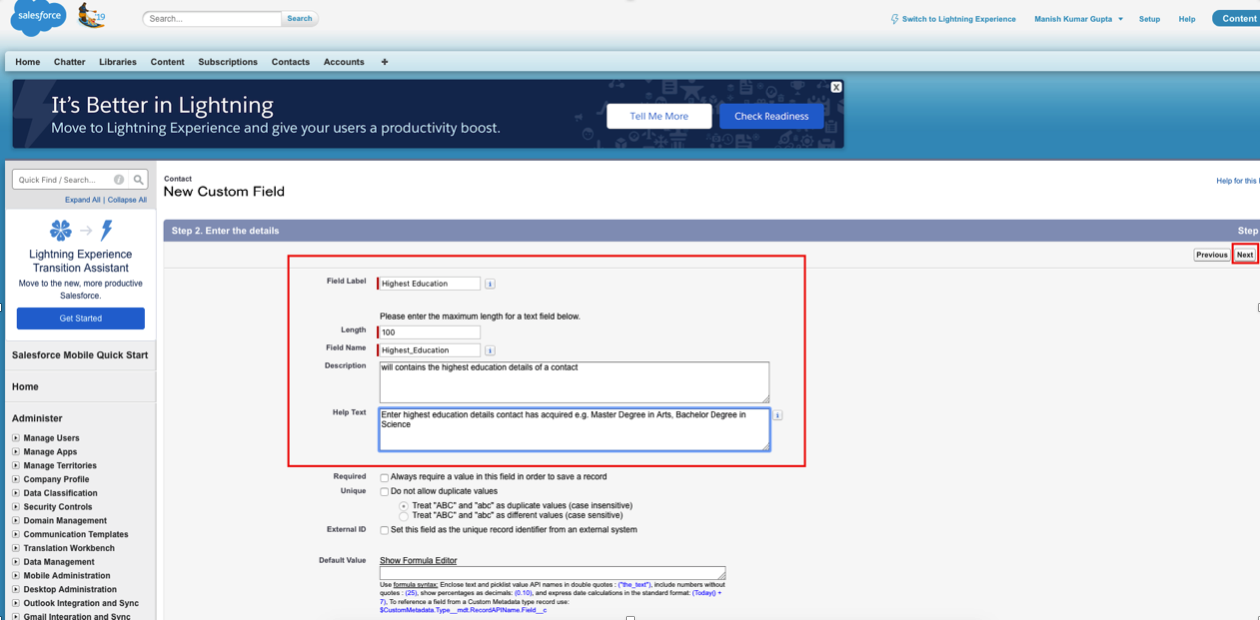
Enter the details of new Custom Fields e.g. Highest Education, length and label etc. and click next.
In next screen, you need to select profile who are allowed to access this new filed. I haven't selected anything specific, left default value. If you have any specific requirement then select relevant profile.
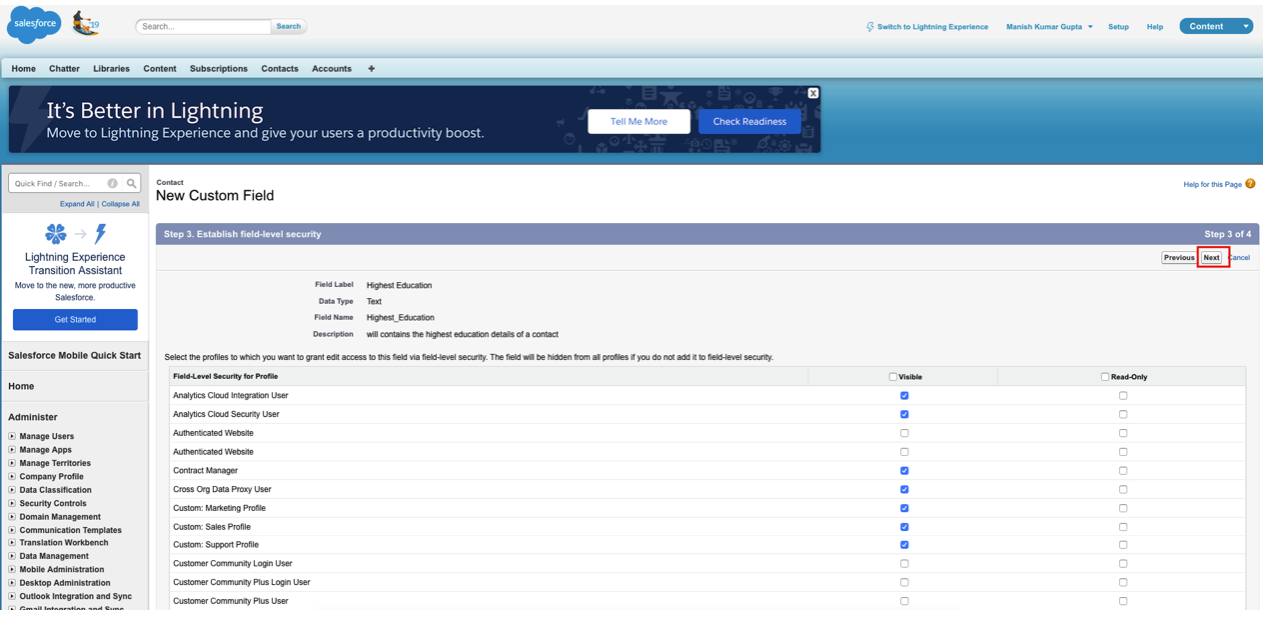
In this screen, page layout needs to selected where this new fields will be appearing, again, I left default value.
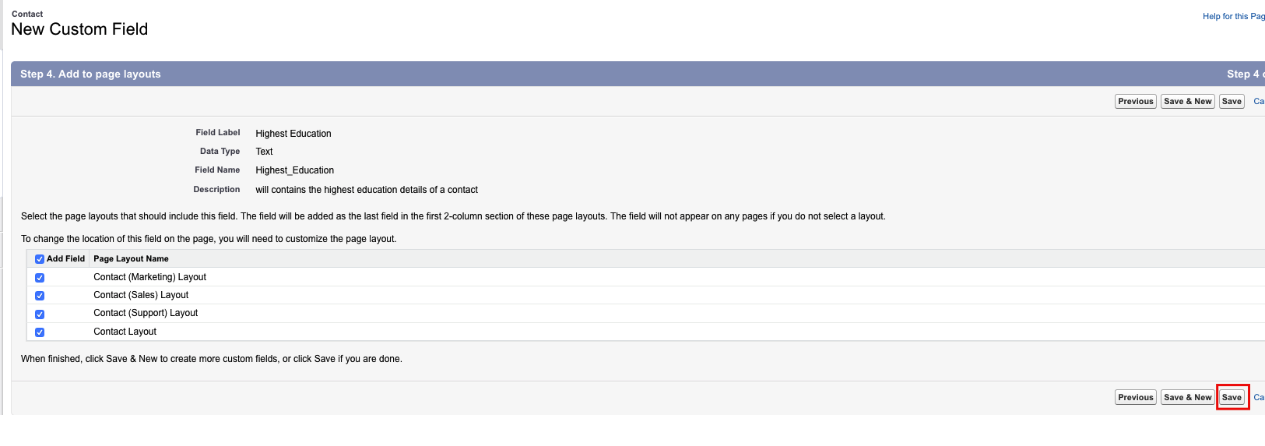
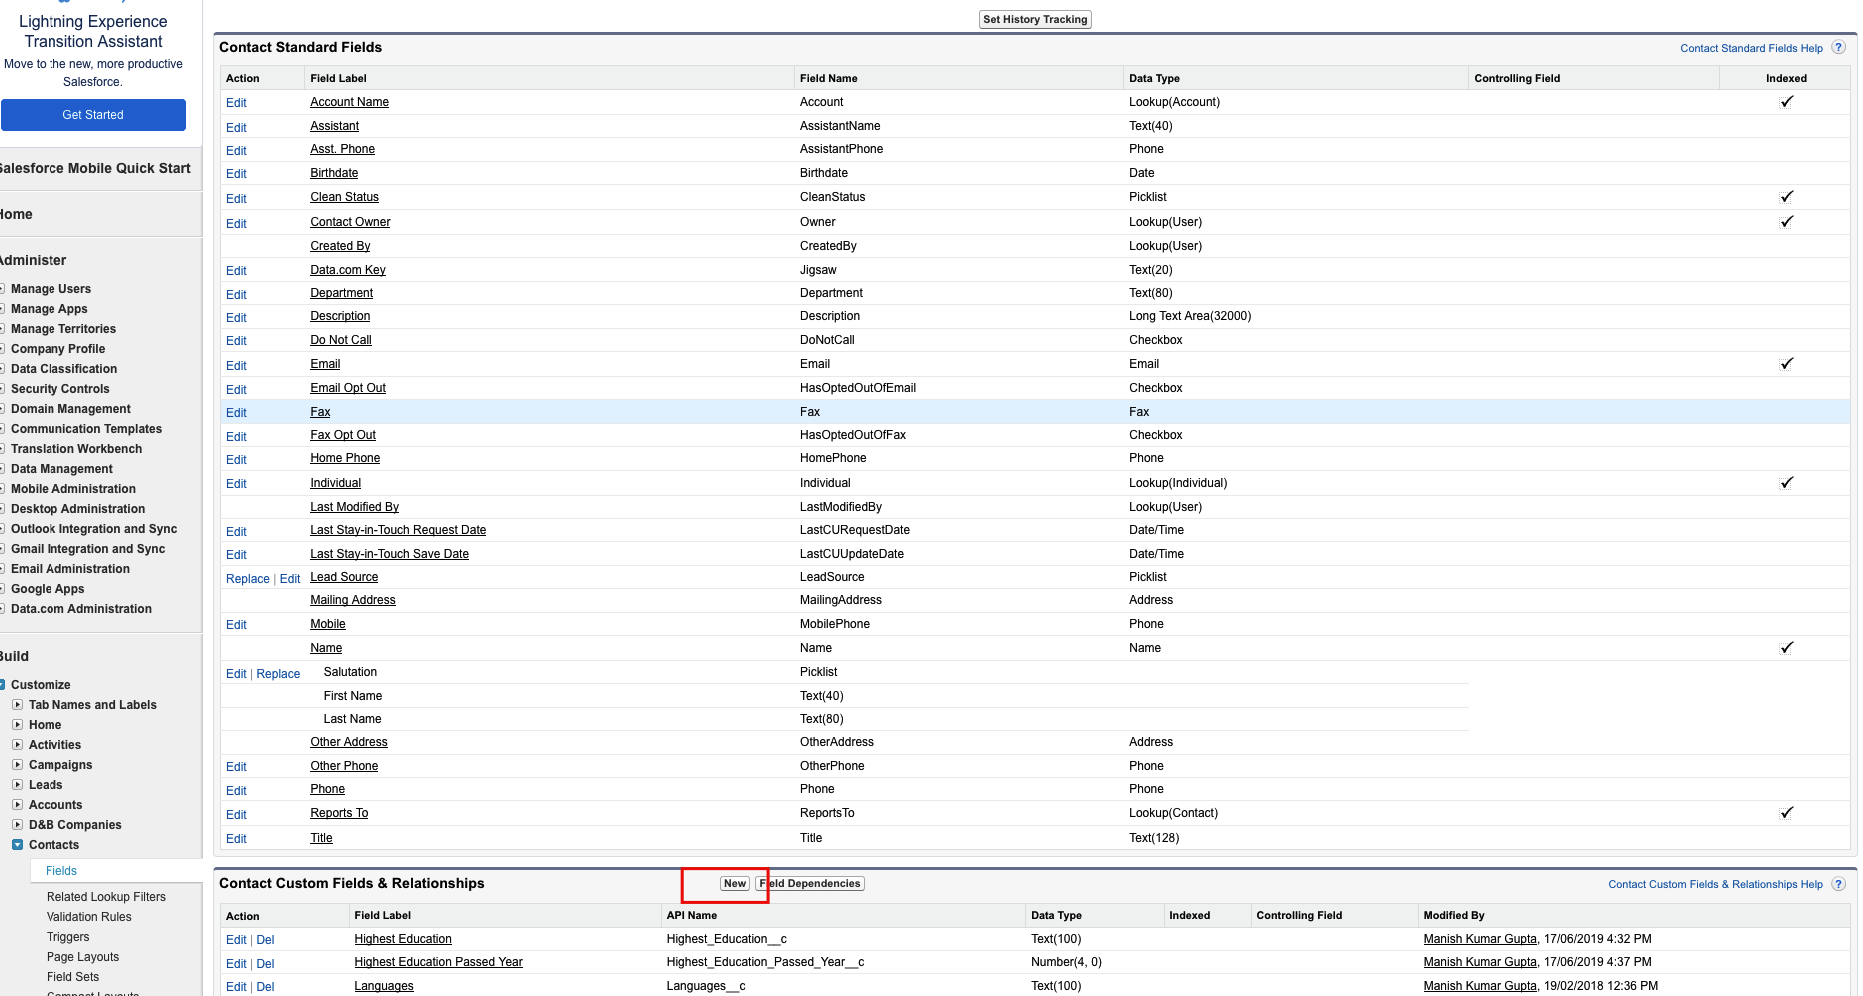
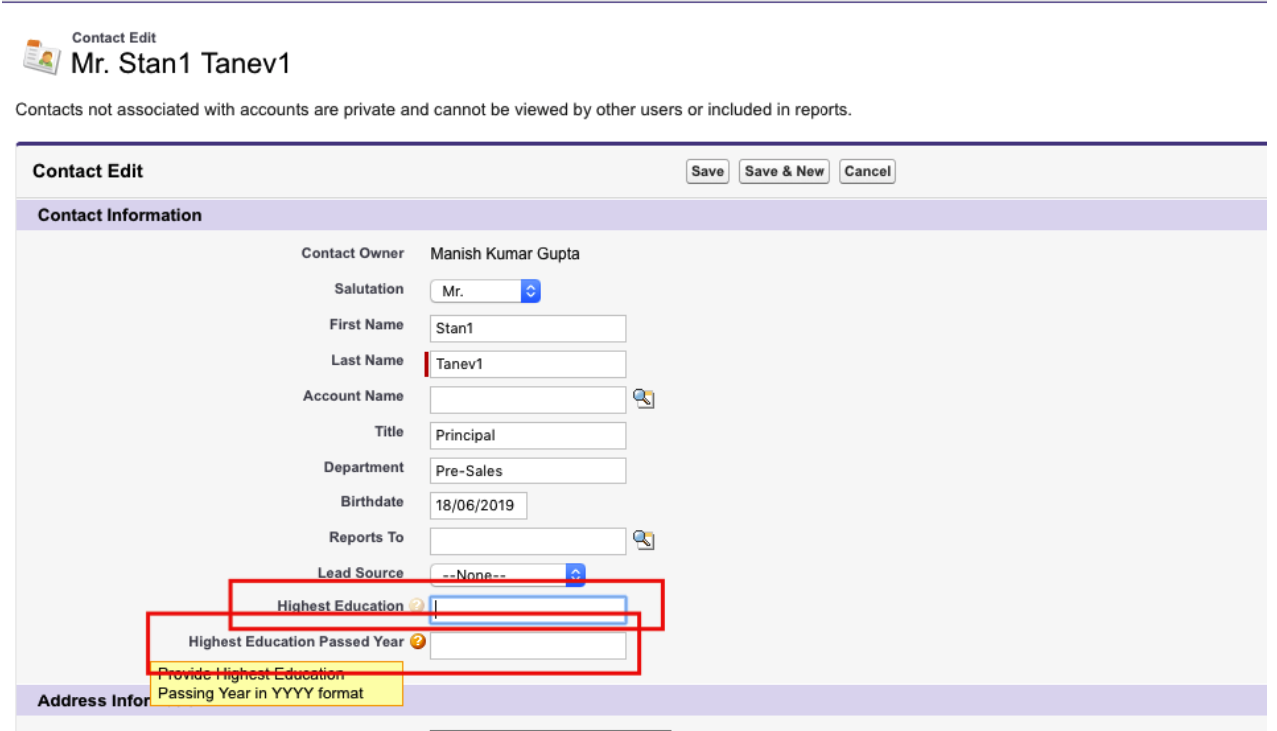
That's it. Now, new custom field "Highest Education" been created. Similarly, create another field "Highest Education Passing Year" as Number filed. Once done both two fields will be look like this -

Now, if you edit any existing contact or create new contact, these two fields should be part of Contact Business Object. Click on any existing contact to verify newly created fields in Salesforce.
So, now custom fields creation process is done, next we need to create connection in OIC for Salesforce.
Create/Update Salesforce Connection in OIC
In order to create connection in OIC for Salesforce, user needs Salesforce Enterprise WSDL, Token and username and password. Please refer this blog to get instruction how to get Token and Enterprise WSLD from Salesforce.
Once you get Enterprise WSDL and token, creating Salesforce Connection in OIC is pretty simple process. Login to OIC console, from home page, navigation to Integration >> Connection >> create >> find and select Salesforce >> specify any valid String as Connection name >> Select Role Trigger and Invoke >> Create >> then configure Connectivity and Security
Configure Security: You need browse Salesforce Enterprise WSDL
Configure Security: You need to provide your password + Salesforce Token. For example: If your password is mypassword, and your security token is XXXXXXXXXX, then you must enter mypasswordXXXXXXXXXX
And Test the connection, it must show you message "Connection SalesForceXXXX was tested successfully."

Now, we are ready with Salesforce Connection. Next Steps to create REST Adapter in OIC.
Create REST Adapter in OIC
In this steps, we need to create a REST Connection in OIC with valid Contact Object JSON Payload having Custom Field as input.
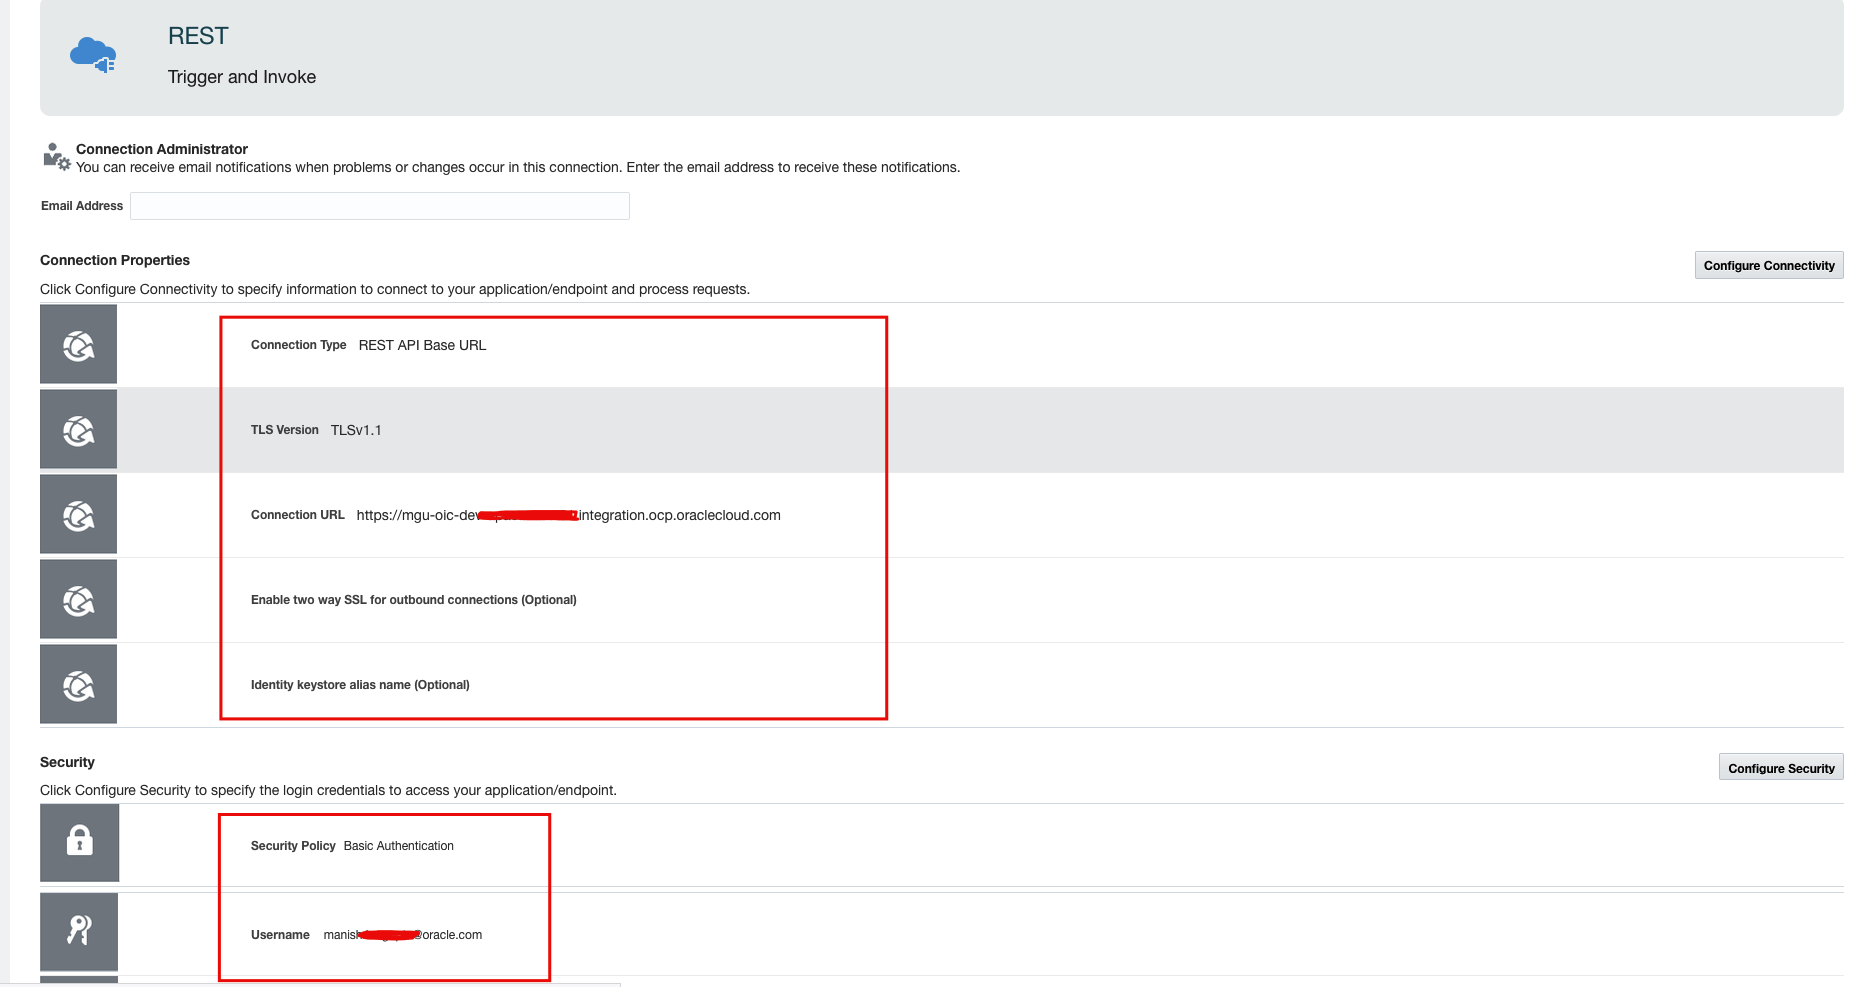
Again, navigate to Connection >> create >> find and select "REST" >> specify any valid String as Connection name >> Select Role Trigger and Invoke >> Create >> then configure Connectivity and Security
Configure Security: Provide your OIC username and password to secure this REST Endpoint.
Now, we are ready with Rest Adapter. In next steps we will be creating Integration.
Create Integration which maps Contact Object Custom Fields from Postman to Salesforce
In this step we will be creating a new Integration, will use REST Connection as source Connection, and Salesforce Connection as Target Connection and will perform mapping.
Navigate to Integration >> Create >> App Driven Orchestration >> Select >> Provide valid Integration name>> Click Create
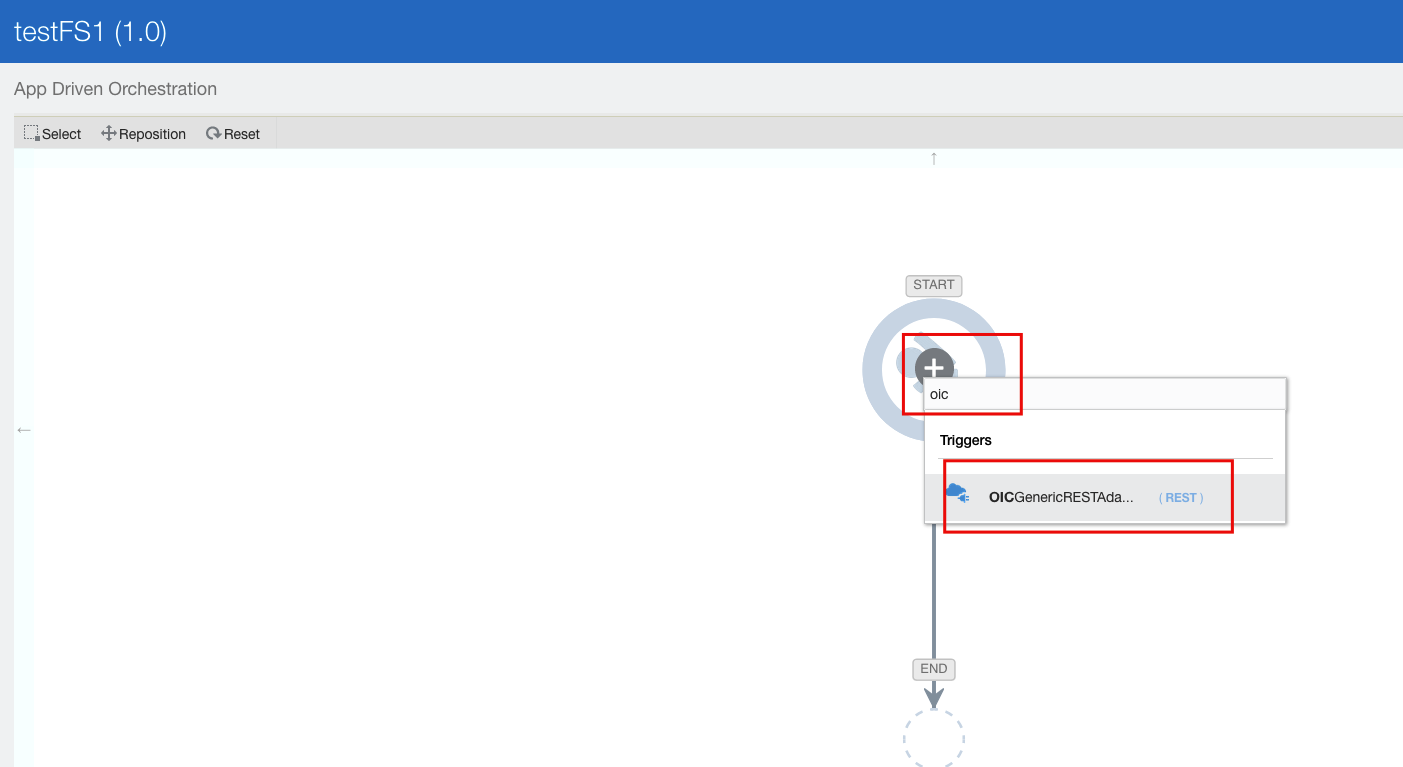
A blank canvas will appear with start option, click on + sign and find out your newly created REST Connection
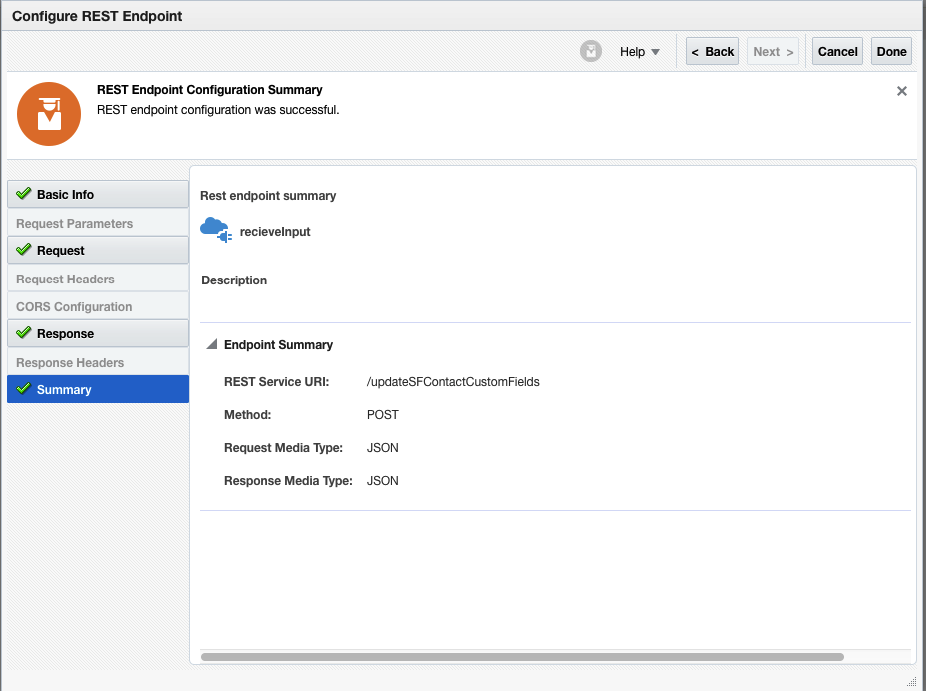
Specify the Endpoint URI e.g. /updateSFContactCustomFields, action as "POST", select "Configure a request payload for this endpoint", click next.
Select "JSON" as Request payload format, provide inline JSON payload as given -
{
"firstName": "manish",
"lastName": "Gupta",
"title": "mr",
"department": "Sales",
"email": "manish.ku.gupta@oracle.com",
"mobile": "090098908",
"AddrStreet": "35 Ethel St",
"AddsCity": "Sydney",
"AddrState": "NSW",
"AddrPIN": "2122",
"AddrCountry": "Australia",
"HighestEdcation": "Master In Science",
"PassedYear": "2002"
}
Once, that done, you will see something like below -
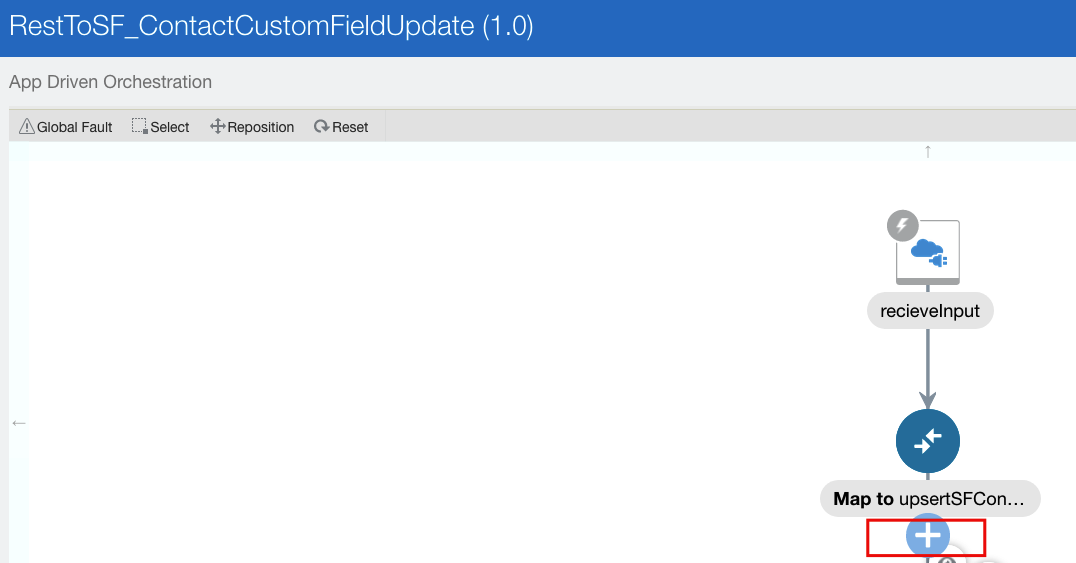
Now, click again + sign to add Salesforce Connection. Once clicked +, you will be able to find out previously created Salesforce Connection, click that and it will open connection wizard.
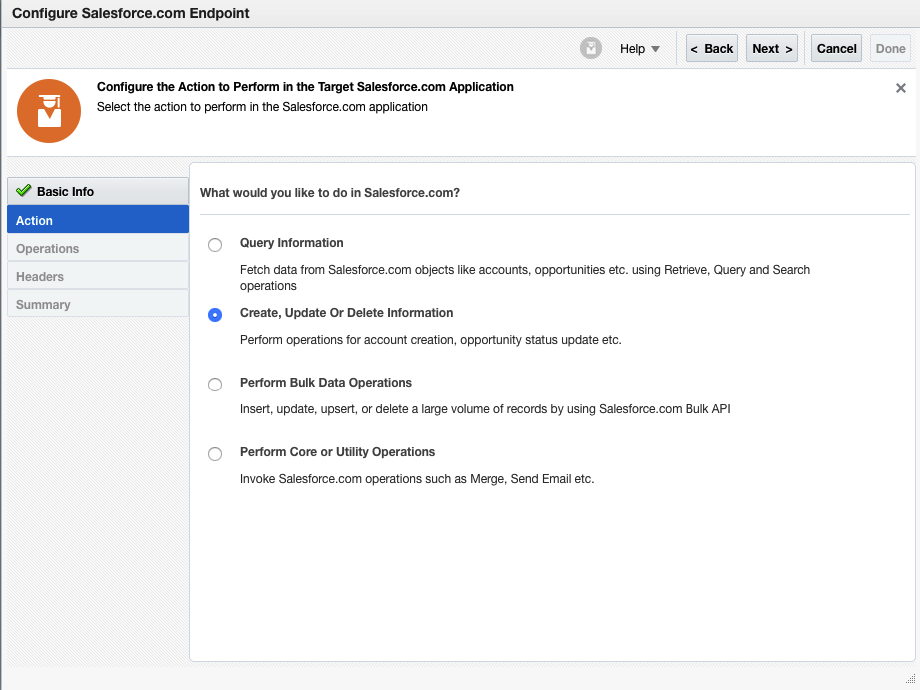
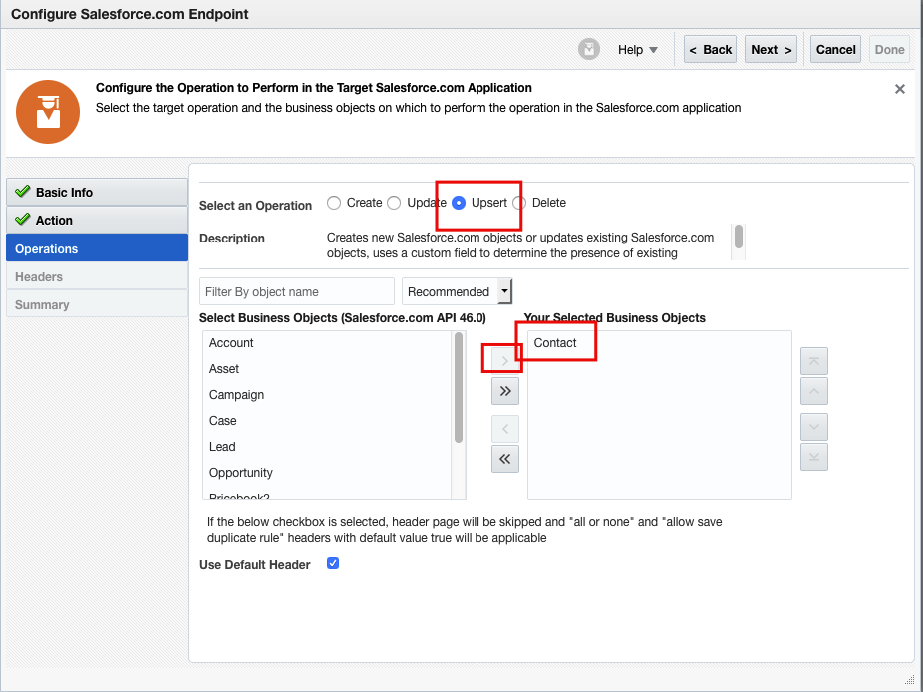
Provide any valid endpoint name >> select "Create, update and Delete Information", click next.
Select "Contact" Business Object from Business Object List, click next and finish the wizard.
Once above step, done you will see flow something similar to this-
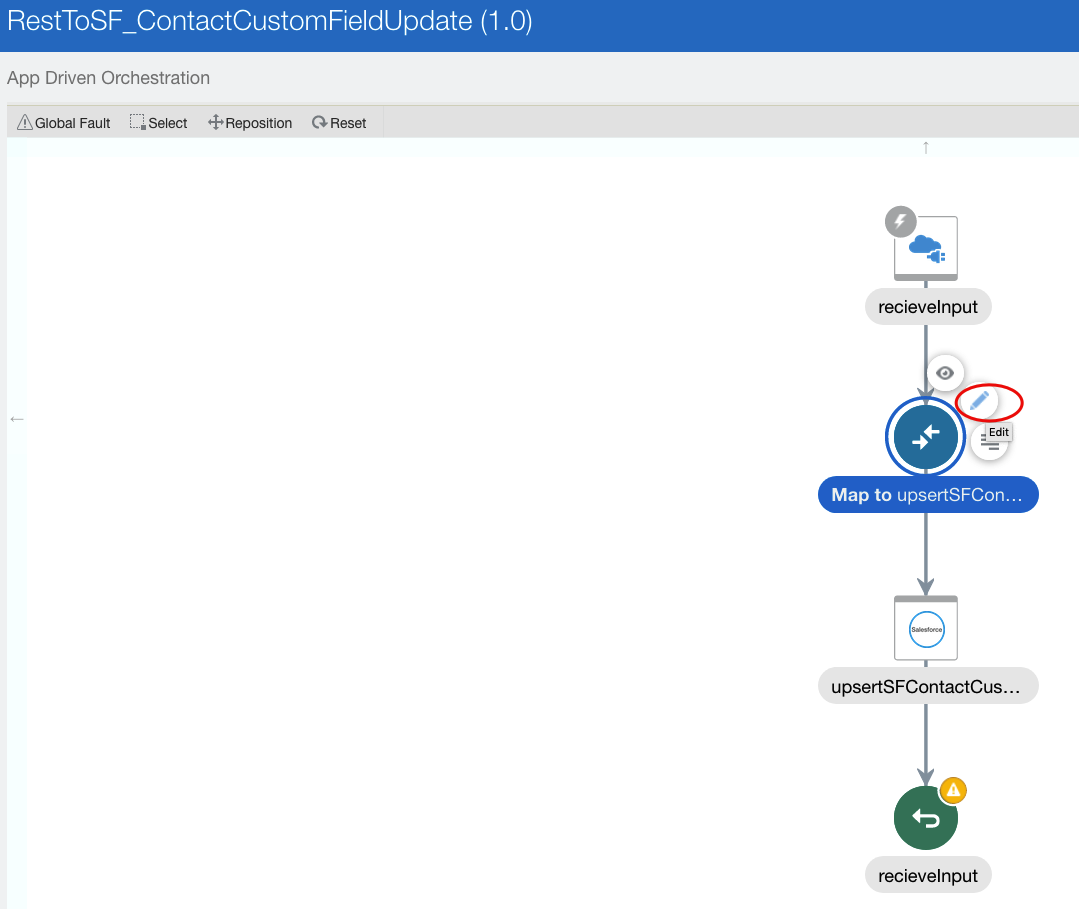
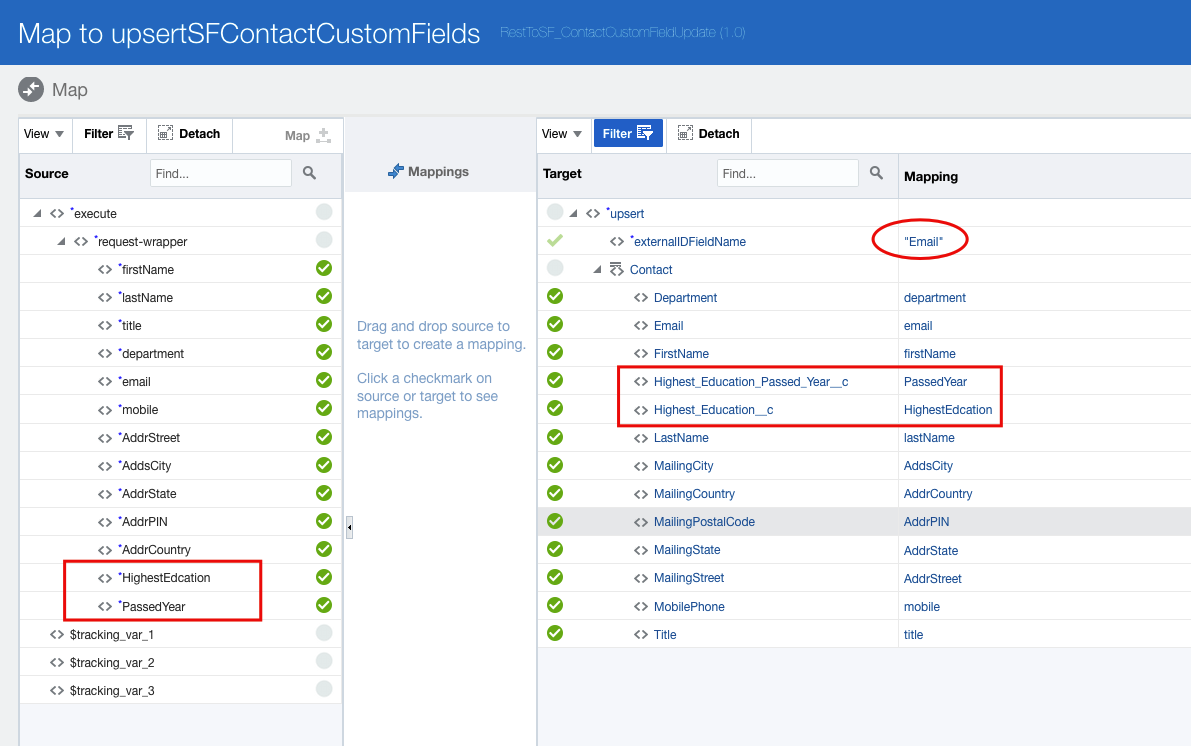
Now, click on Edit option in mapping and perform Source To Target elements mapping and you would be able to see newly added Custom Fields.
Note: Since, I selected Upsert operation, we need to set "externalIDFieldName" to some valid Field name which we can use as Unique key to perform Upsert Operation. In my case I have selected "Email". However, you can use any other fields as well e.g. Mobile number etc.
Once mapping done, Set tracking fields to "FirstName" or "Email" etc. Activate the Integration, get the Integration URL and be ready to tests the Integration.
Trigger Integration using POSTMAN tool
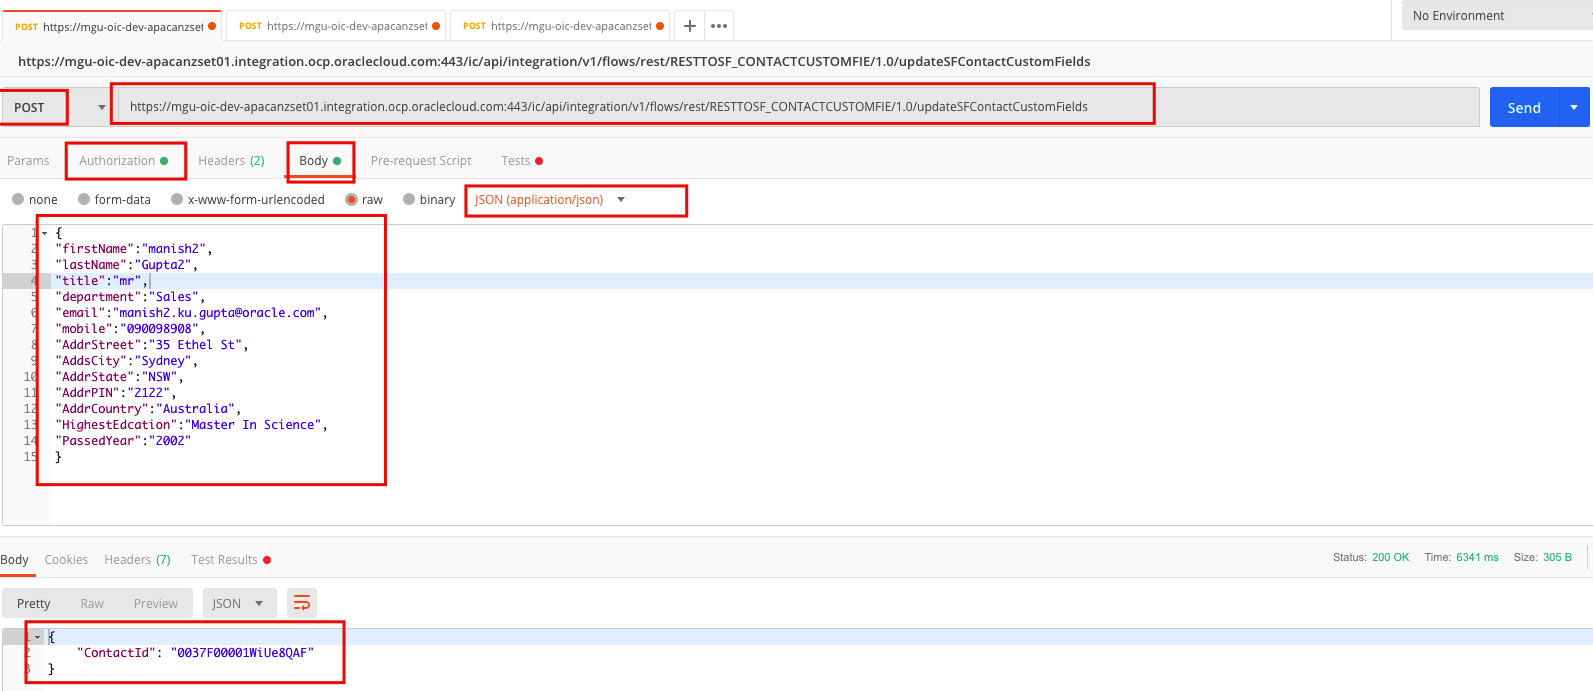
Open the Postman tool, specify this Integration URL there, specify basis authentication, set body type as "JSON(application/json), action as "POST" and click send button to trigger the transaction-
Use below payload body -{
"firstName":"manish2",
"lastName":"Gupta2",
"title":"mr",
"department":"Sales",
"email":"manish2.ku.gupta@oracle.com",
"mobile":"090098908",
"AddrStreet":"35 Ethel St",
"AddsCity":"Sydney",
"AddrState":"NSW",
"AddrPIN":"2122",
"AddrCountry":"Australia",
"HighestEdcation":"Master In Science",
"PassedYear":"2002"
}
Verify Result In Salesforce
Once transaction executed successfully, you will contact id in response body.
Login to Salesforce and verify newly created Contact and Custom Fields.
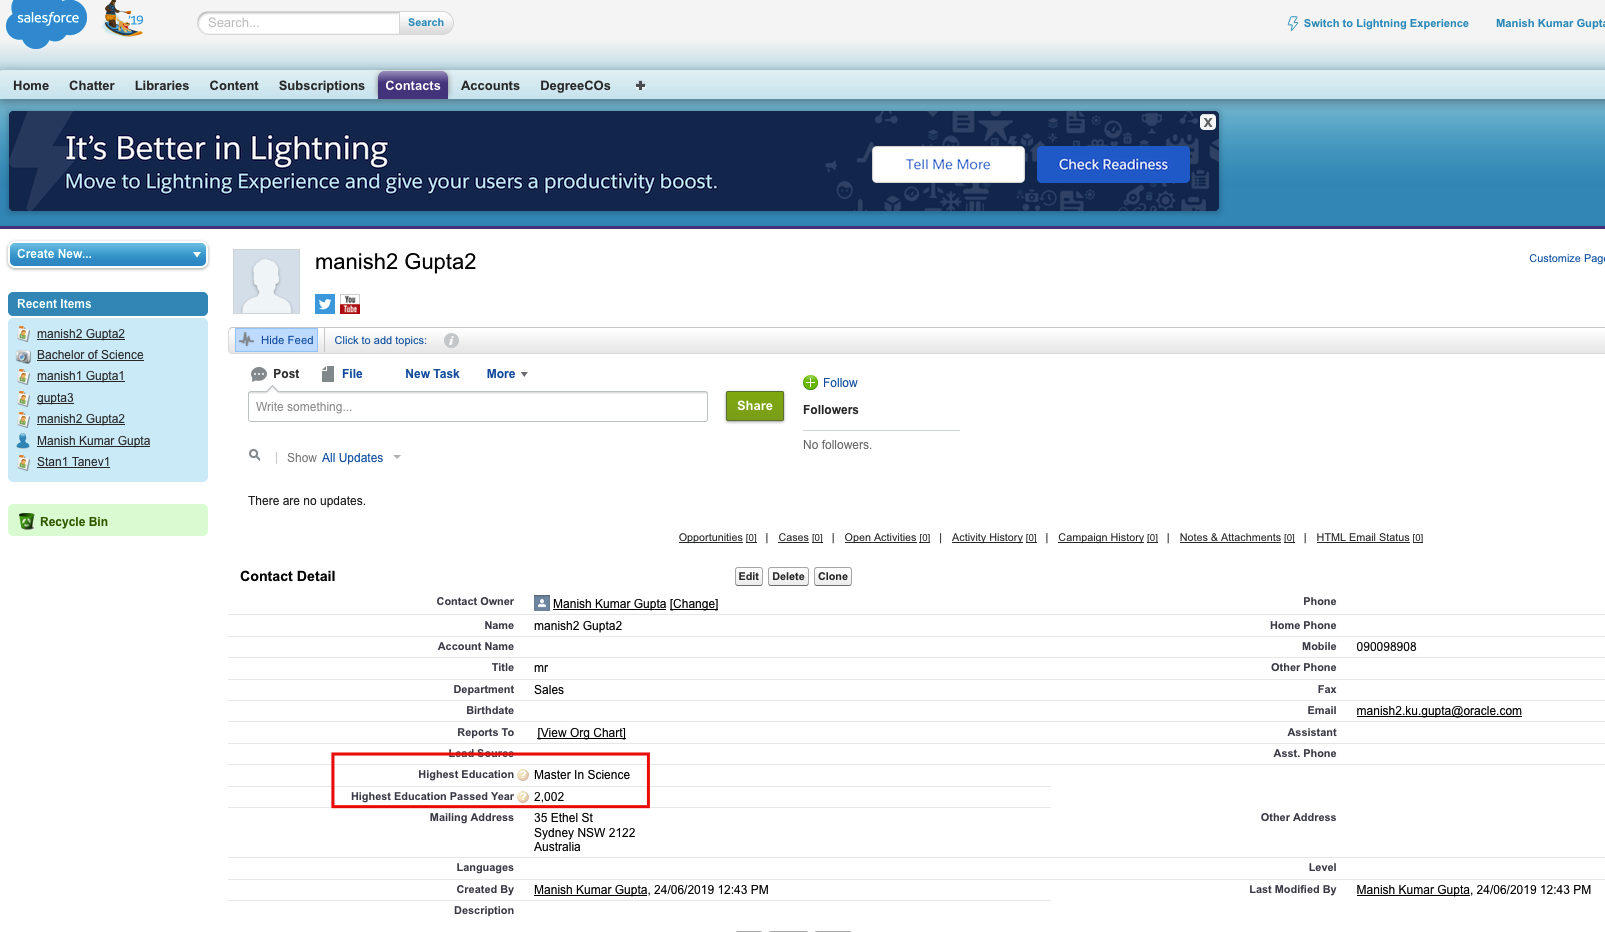
That's it, as you can witness that the newly created Contact has newly created Custom Fields visible in Salesforce.
I hope, this blog will help you to understand how easily and simply we can add new Custom Fields in Salesforce and can perform create/update operation using Oracle Integration Salesforce Adapter.
Soon, I will be publishing another blog for creating a new Custom Object in Salesforce and control the same using Oracle Integration Cloud Salesforce Adapter. So, stay tuned !!!
Happy Blogging :)