Oracle’s two major ground breaking innovation last year were Autonomous Data warehouse (ADW) and Autonomous Database Transaction processing
(ATP) both are database offering suitable for different workload and
are self-driving, self-securing, and self-repairing in nature. If you
want to read more about these services then please go through above
links.
ADW/ATP both can be quickly provisioned
on Oracle Cloud Infrastructure, it’s take less than 5 minute to spin
ADW/ATP instance and database is ready to connect.
User can use Oracle SQL Developer to
connect to ADW/ATP database as long as they are supported version. These
DBaaS services also offers out-of-box browser based SQL Developer tool
which can be used to run any kind of SQL statements.
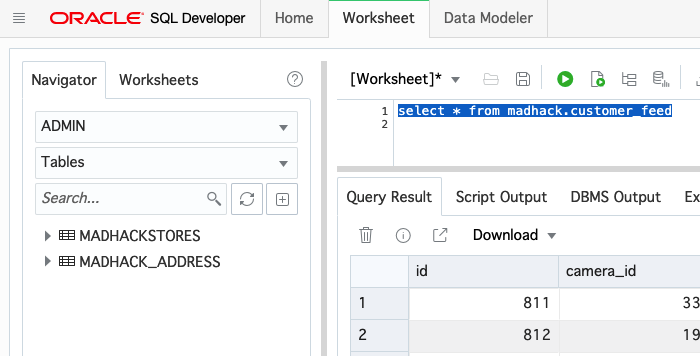
Here is sample snap of browser based SQL Developer capabilities –

Once user has Database ready, obviously there could be requirement to access data residing inside ADW/ATP instances.
Fortunately, Oracle Integration Cloud provide Adapter for connecting ADW/ATP instance, click here to know more about ATP Adapter capabilities –
In this blog I will be covering simple
steps how you can connect to ADW/ATP instances using OIC Autonomous
Transaction Processing Adapter (ATP) Adapter.
I made assumption that ADW/ATP instance already exists. if you not sure how to create ADW/ATP instance then refer this blog which was written by my colleague who already explained how to create ADW/ATP database instance and connect from SQL developer.
So, let move forward. Login to your
Oracle Integration Cloud (OIC) home page >> Integration >>
Connection >> Create >> search for “Oracle ATP” >>
select the same

Provide a meaningful name to your ATP Adapter connection, select role “Invoke” and click create.
Please Note: Currently
only Invoke Role is supported, which means OIC can only invoke ADW/ATP
Database. OIC integration won’t be able to trigger itself when there is
any changes in ADW/ATP database.
Now, In order to connect ADW/ATP database instance you need following values –
Wallet File:
Read the document about Wallet file here.
This is one of the most important zip files containing private keys,
keystore files, tnsname.ora files and many other useful configuration
files. Keep it safe and don’t share with anyone until unless you trust
him and want to provide access to your ADW/ATP instance.
Oracle client credentials (wallet files)
are downloaded from Autonomous Transaction Processing by a service
administrator. If you are not an Autonomous Transaction Processing
administrator, your administrator should provide you with the client
credentials.
To download client credentials, do the following from Oracle Cloud Infrastructure console:
Navigate to the Autonomous Transaction Processing details page.
Wallet.zip can be downloaded from two
different location 1) DB Connection and 2) Service Console >>
Administration >> Download Client Credentails (Wallet)

Note: We have seen some
connectivity problem using the downloaded files from DB Connection
section, which we have already highlighted to Oracle support and they
must be fixing while I am writing this blog, So I would recommend to
download wallet file from “Service Console>> Administration >> Download Client Credentials (Wallet)”
In the Download Wallet dialog, enter a
wallet password in the Password field and confirm the password in the
Confirm Password field.
The password must be at least 8
characters long and must include at least 1 letter and either 1 numeric
character or 1 special character.

Note:This password protects the
downloaded Client Credentials wallet. This wallet is not the same as the
Transparent Data Encryption (TDE) wallet for the database; therefore,
use a different password to protect the Client Credentials wallet.
Click Download to save the client security credentials zip file.
By default the filename is: Wallet_.zip. You can save this file as any filename you want.
You must protect this file to prevent unauthorized database access.

Service Name:
The .zip provided with the
credentials zip file contains five database service names identifiable
as
tnsnames.ora file
resides inside Wallet_tpurgent, tp, high, medium, and low.
The predefined service names provide different levels of performance
and concurrency for Autonomous Transaction Processing. To know more
about these predefined service name, refer this document.Wallet Password:
Provide the password which you have provided while downloading Wallet_.zip file.
Database Service username:
Its schema name or DB username.
Database Service Password:
Password for Schema name or DB username.
Final Config something look like this –

So, your ATP Adapter connection is ready to be used inside Integration.
Just create any type of OIC Integration flow and use this connection inside flow.
Once you drop the ATP connection instance in your OIC flow, its exposes 3 different kinds of operations-
- Invoke Stored Procedure
- Run a SQL Statement
- Perform an operation on Table
Once you select particular operation, it
changes the subsequent wizard screens .In below snap I have selected
“Perform an Operation on a table” option, hence its showing me Insert,
Update, Merge, Select sub-operation.

To understand more about of each of these operations, please refer this document section.
That’s easy is to connect to an ATP or
ADW Database instance using Oracle Integration Cloud Oracle Autonomous
Transaction Processing Adapter.
Stay tuned for more useful blog!!!
Happy Blogging 
No comments:
Post a Comment